How to Wax Eyebrows: A Professional Guide to Precision Shaping
Eyebrow waxing is more than just getting rid of hair; it's an art form that shapes and defines the face. To do a professional brow wax well, you need to know how to do it safely, know how to do it right, and know how the face works. This is how you get the sharp, clean results that tweezing and shaving can't match. The look is both polished and naturally beautiful.
FREE COURSE
Turn Your Passion for Beauty Into a $75K+ Waxing Business
Course succesfuly sent. 🎉 Please go to your inbox to recieve it.
Getting Professional Results from Eyebrow Waxing
Perfectly shaped eyebrows are a key part of modern beauty services and can instantly make a client's features look better. For any professional, giving a perfect brow wax isn't just about how to do it; it's also about gaining the trust of clients and building a reputation for quality and accuracy. This guide is all about the rules that set apart a bad brow service from a great one.
It's clear that people want perfectly shaped brows. In 2023, the global market for eyebrow makeup products, including professional-grade waxes, was worth USD 306.06 million. By 2030, it is expected to reach USD 539.17 million, which shows how much clients value professional results. If you want to know more about how big this trend is, you can read the whole research about the growth of the eyebrow product market.
The Key to a Better Brow Wax
You need to know the basics in order to always get a professional finish. Before we go over the steps in detail, it's important to know why each one is necessary. With this information, you can be sure that the service you provide will make your clients feel safe and change their lives.
These are the most important parts of a professional eyebrow wax:
Client safety and comfort are not up for discussion. It means putting skin health first by using high-quality products and keeping things clean to avoid irritation.
Precision and Artistry: This is when you go beyond just getting rid of hair. It's about shaping brows in a way that makes your client's natural bone structure look better.
The goal is a sharp, clear look that stays clean for weeks. This shows how much better your professional service is than doing it at home.
To do a good job with brow wax, you need both technical skill and artistic vision. It's about making clean lines and a shape that is symmetrical so that clients are proud to wear it. This, in turn, builds the loyalty that every successful esthetician wants.
Seeing the best possible outcome is very important. Learning about different eyebrow styles can help you get better at what you do and learn more about what your clients like.
If you understand these basic ideas, you'll be able to master a service that shows off your skills from the first appointment.
Choosing the Right Tools for Waxing Your Eyebrows
The tools you use are very important when you learn how to wax eyebrows. The quality of your supplies is directly related to the quality of your work. The first step to providing a clean, safe, and comfortable service for all of your clients is to put together a professional-grade kit.
A tidy station not only looks professional, but it also makes your clients feel safe and at ease. Every tool, from the wax warmer to the oil you use after waxing, has a job to do. Buying good tools helps you avoid making mistakes, so you can concentrate on making the perfect arch.
The Base of Your Waxing Station
You need to set up a good place for cleaning and getting ready before you even touch the wax. This is the most important part of a safe practice that keeps you and your client safe from start to finish.
Your basic toolkit should have:
An EPA-approved disinfectant to keep your station and any tools you use again clean.
Use disposable gloves to keep things clean and stop cross-contamination.
A gentle pre-wax cleanser that gets rid of oils, makeup, and other things that aren't good for your skin.
Cotton rounds or pads to use with cleansers and other treatments before waxing.
Small, precise applicators, such as thin wooden spatulas, made for detailed work on the brows.
Having these basics ready makes sure that every service is smooth and clean, which is what makes a professional different from an amateur.
Choosing Your Wax: Hard vs. Soft Wax
Now for the most important decision: your wax. The skin around the eyes is incredibly delicate, so you need a product that is both effective and gentle. While soft wax (also called strip wax) is used in professional waxing, hard wax is the expert’s choice for brows and other facial services.
Hard wax is transformative. It cools and firms up on its own, so you don't need a cloth strip for removal. More importantly, it adheres only to the hair-not the skin. This makes the process significantly less painful and reduces the risk of irritating or lifting the sensitive brow skin.
For precision eyebrow shaping, a high-performance hard wax is the professional standard. It grips fine hairs securely while remaining gentle on the skin, offering a level of comfort and control that soft wax cannot match in such a delicate area.
To make the choice clearer, here's a direct comparison.
Hard Wax vs Soft Wax for Eyebrow Shaping
Feature
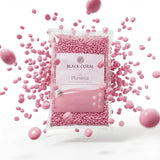
Hard Wax (e.g., Black Coral Pele Beads)
Soft Wax (Strip Wax)
Adhesion
Shrink-wraps and adheres only to the hair, not the skin.
Adheres to both the hair and the top layer of skin.
Application
Applied thicker for controlled, precise patches.
Applied in a very thin layer, making precision difficult.
Pain Level
Significantly less painful because it doesn't pull on the skin.
Can be more painful as it pulls the skin during removal.
Skin Type
Ideal for all skin types, especially sensitive skin.
Can cause redness, irritation, or skin lifting.
Residue
Leaves little to no sticky mess behind.
Often leaves a sticky residue that needs an oil-based remover.
As you can see, hard wax is the clear winner for brows.
Brands like Black Coral Wax offer premium hard wax beads like Pele or Plumeria, which are formulated with a lower melting point. This is a significant advantage, as it means the wax is applied at a comfortable temperature, making the experience even safer and more pleasant for your client.
If you are building your entire setup from scratch, this ultimate wax kit guide is an excellent resource to ensure you have everything needed for a professional service.
The Art of Brow Mapping and Skin Preparation
A superior brow wax doesn't start with wax; it starts with a plan. The true artistry lies in the preparation, where you design a shape that flatters your client's unique facial structure. This is what brow mapping is all about-it elevates a simple hair removal service into a custom design experience.
Brow mapping is how professionals create symmetry and balance. By marking key points on the face, you can design a brow shape that works with their bone structure, not against it. This removes guesswork and ensures you and your client are aligned before any hair is removed.
This is also your opportunity to manage expectations. Discussing their goals, reviewing inspiration photos, and explaining what is achievable with their natural brows builds trust and makes the entire experience feel collaborative.
The Three-Point Brow Mapping Method
The go-to professional technique is the three-point mapping method. It uses the client’s nose and eyes as guides to find the perfect start, arch, and end for each brow, ensuring the final shape is balanced and customized.
You’ll need a thin mapping tool for this, such as a pre-inked string or a long, straight spatula.
The Start: Hold your tool vertically from the dimple of the nostril straight up to the brow. This is where the brow should begin. Mark this point. Starting brows too far apart can make the nose appear wider; too close can make the eyes look smaller.
The Arch: Keeping the tool at the nostril, angle it so it passes through the center of your client’s pupil as they look straight ahead. Where your tool meets the brow bone is the natural highest point of the arch. This is a crucial mark.
The End: Lastly, pivot the tool from the same nostril point to the outer corner of the eye. Where it meets the brow is the ideal tail end. This prevents you from making the tail too short, which looks unfinished, or too long, which can drag the eye downward.
Once you have these three marks, connect them with crisp, straight lines to outline the desired shape. Everything outside of this outline is now ready for waxing.
Brow mapping is your blueprint for perfection. It’s a non-negotiable step that guarantees symmetrical, flattering results and gives clients the confidence that they are in the hands of a true expert.
Essential Skin Preparation for a Safe Wax
With the brows perfectly mapped, it's time to prepare the skin. This step is your best defense against irritation, redness, and skin lifting. For any professional service, skipping skin prep is not an option.
The goal is to prepare the skin so the wax adheres firmly to the hair but releases cleanly from the delicate skin underneath. This ensures a much more comfortable experience for your client.
First, the area must be completely clean. Use a dedicated pre-wax cleanser to wipe away any makeup, natural oils, or lotions. Without this step, the wax cannot grip the hairs properly. An alcohol-free formula is best to avoid drying the skin. For more on this, review our guide on using a pre-wax cleanser.
Next, create a protective barrier. A very light layer of pre-wax oil or powder does the trick. This thin barrier ensures the wax shrink-wraps around the hairs only, minimizing any pull on the skin itself during removal.
Finally, ensure the skin is completely dry. Any lingering moisture from the cleanser or oil will interfere with the wax's grip. Gently blot the area with a clean cotton round before you begin applying wax.
Your Guide to Wax Application and Removal
This is where your preparation pays off. The application and removal process is what transforms a beautifully mapped brow into a perfectly clean arch. Success comes down to control - over your wax, your applicator, and your technique.
Your goal is to apply the wax confidently and remove it cleanly, ensuring client comfort and a flawless result. Let's break down how to master this part of the process like a professional.
Achieving the Perfect Wax Consistency
Before the wax touches the client's skin, it must be at the right temperature and texture. This is non-negotiable for both safety and performance. Wax that’s too hot is a serious burn risk. Wax that’s too cool will not grip the hair, resulting in patchiness and difficult cleanup.
The ideal consistency for a professional hard wax is a thick, pliable honey. It should drizzle slowly from your spatula, not run off it. This texture provides total control, allowing you to lay down crisp, clean lines without the wax dripping where you don’t want it.
Warm it slowly: Melt your wax beads in a professional warmer on a medium-high setting, then reduce it to a low-to-medium holding temperature.
Stir and test: Stir the wax frequently to maintain even heat. Always test a small patch on the inside of your wrist before applying it to a client. It should feel comfortably warm, never hot.
This attention to detail ensures the wax grips every hair for a clean pull.
The Precision of Wax Application
Once your wax has the perfect honey-like consistency, it’s time to apply. For brows, precision is everything. Use a small, thin applicator-like a small wooden spatula or a dedicated brow stick-to achieve the control needed for detailed work.
Dip your spatula in the wax and twirl it to prevent drips. Apply the wax in the direction of hair growth with firm but gentle pressure, ensuring it coats the hair to the base. Work in small, manageable sections, following the clean lines from your mapping. This is not the time for large patches; think of it as painting with purpose.
A key professional technique is to create a small, slightly thicker "lip" at the end of each wax strip. This ridge provides a clean, easy-to-grip edge for a swift and efficient removal, making the process more comfortable for the client.
For professionals using Black Coral Wax's low-melt hard waxes, such as our Plumeria or Pele beads, the client experience is noticeably improved. Data from over 10,000 estheticians indicates these formulas can lead to a 40% reduction in client discomfort compared to traditional soft waxes, thanks to their flexible pull and superior grip on fine facial hairs. For more on market trends, you can discover more insights about eyebrow product market reports.
Mastering the Removal Technique
How you remove the wax is as important as how you apply it. A quick, clean pull is the secret to less pain and no hair breakage. Once the hard wax has set-it should feel firm but slightly flexible-you’re ready to remove it.
This is a two-handed task. Use one hand to hold the skin taut right next to the wax strip. This anchors the skin, preventing it from pulling up with the wax, which is the primary cause of pain and potential bruising.
With your other hand, grip the lip you created. In one swift, fluid motion, pull the strip off. The trick is to pull parallel to the skin and against the direction of hair growth. Never pull upwards and away from the face, as this causes skin lifting and unnecessary pain. The motion should be fast and confident.
Troubleshooting Tricky Growth Patterns
Not all brows are straightforward. You will encounter clients with tricky hair textures or growth patterns, such as hairs that grow downwards, sideways, or in swirls.
For swirling patterns: You may need to apply wax in two smaller, separate sections to follow the different directions of growth.
For coarse or stubborn hairs: Apply firm pressure during application to ensure the wax fully envelops the hair shaft. You may also need to let the wax set a few extra seconds for a stronger grip.
Learning to adapt your technique is what separates a good esthetician from a great one. To delve deeper into hard wax techniques, you can learn more about how to use hard wax effectively in our in-depth guide. Nailing these steps ensures every client leaves with beautifully defined, smooth brows and an experience they will want to repeat.
Mastering Aftercare and Preventing Common Issues
Your work isn't finished once the last hair is removed. The final, and arguably most important, part of a professional brow wax happens after the service. This is where you transition from service provider to trusted expert, building the loyalty that keeps clients returning.
The skin needs immediate calming and protection. After tweezing any stray hairs, your first priority is to gently remove any wax residue and soothe the skin.
Soothe and Protect Immediately After Waxing
Right after a wax, the skin is at its most vulnerable. Follicles are open, the area is typically pink, and it can feel sensitive. Your actions in these next few moments set the tone for a quick, calm recovery.
Remove Residue: Using a cotton pad, apply a quality post-wax oil. Gently wipe the entire brow area. This dissolves any sticky wax remnants and provides the skin with its first layer of much-needed moisture.
Calm the Skin: Follow up with a soothing post-wax lotion. Look for products with ingredients like aloe vera or chamomile, which are excellent for reducing inflammation and calming redness quickly. Apply with a light touch-no harsh rubbing.
These two simple steps make a world of difference in your client’s immediate comfort and the skin's appearance as they leave your salon.
What clients do at home is just as critical as what you do in the salon. Instead of a long list of rules, provide clear, simple instructions to prevent irritation, breakouts, and other common issues.
Arm your clients with this essential checklist for the next 24 to 48 hours:
Avoid Heat: No hot showers, saunas, steam rooms, or strenuous exercise. Heat can worsen irritation and open pores to bacteria.
Stay Out of the Sun: Freshly waxed skin is highly susceptible to sun damage and hyperpigmentation. Advise clients to avoid direct sun and tanning beds.
Hands Off: This is crucial. Remind them not to touch the area. Hands carry oils and bacteria that can clog open follicles and cause pimples.
Gentle Products Only: For a couple of days, they should avoid harsh exfoliants, retinoids, acids (like AHAs/BHAs), and fragranced products around the brows. A simple, gentle cleanser is sufficient.
Client education is the final, and perhaps most critical, step of a professional brow service. When clients leave with clear instructions, they feel cared for and are more likely to achieve the beautiful, long-lasting results that bring them back.
The Secret to Preventing Ingrown Hairs
Ingrown hairs are a common concern, but they are also highly preventable with the right routine. An ingrown hair occurs when it curls back and grows into the skin, usually because dead skin cells are blocking its path.
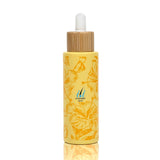
The solution is a simple two-part system: gentle exfoliation and consistent moisture. This routine should begin a few days after the initial 48-hour healing window. A specialized product like Black Coral's ili Oil is perfect for this. It's formulated to provide very light exfoliation while deeply moisturizing the skin. This keeps the skin soft and supple, allowing new hairs to break through the surface easily.
This level of detailed aftercare is what separates a good service from a great one. Salons report a 25% higher client retention rate when they offer waxing with dedicated post-care products. This is particularly relevant when you consider that about 15% of first-time waxers experience ingrowns. The precision of waxing-which provides 3-6 weeks of smoothness-is a clear advantage over brow gels that can wash off 70% faster in humid weather. You can discover more insights about eyebrow product market reports to see the high demand for lasting results.
By teaching clients these effective steps, you help them maintain flawless brows between appointments. For a full rundown of product recommendations, you can learn more about after waxing care products and how they create perfect, irritation-free results.
Common Questions About Eyebrow Waxing
Even with the best technique, questions are inevitable. Whether you're a professional refining your craft or a client considering their first brow wax, clear answers build confidence. Here are the most common questions about waxing eyebrows, with straightforward, reassuring advice.
How Long Do Eyebrow Waxing Results Last?
Professionally waxed brows usually stay sharp for three to six weeks. The length of time depends on how fast a person's hair grows.
Waxing pulls hair out at the root, which makes it grow back more slowly and often finer over time. Making an appointment every four weeks is the best way to keep your shape clean and defined. This timing catches new growth when it's long enough for the wax to hold on to, which makes sure that the finish is always smooth.
Can I wax my eyebrows if my skin is sensitive?
Yes, but you have to be smart and careful about it. The right products are not up for discussion. A high-quality, hypoallergenic hard wax is the only professional choice for people with sensitive skin.
A premium hard wax is different from soft wax because it doesn't use strips. Instead, it only grips the hair and not the skin. This one change makes a big difference in how much redness, irritation, and skin lifting risk you have.
For skin that is easily irritated, the best combination is a professional-grade hard wax, a pre-wax oil that protects, and a post-wax treatment that calms. This is the key to a pleasant service every time.
It's also very important to tell your esthetician if you use acids or retinoids in your skin care products, like AHAs or BHAs. To keep your skin safe, you will need to stop using them for a short time before your appointment.
How can I make an eyebrow wax less painful?
It's normal for an eyebrow wax to hurt a little, but it shouldn't hurt a lot. The esthetician's skill and the quality of the wax are the two most important things.
A skilled professional knows to keep the skin taut while pulling, which makes a huge difference in comfort. Using a high-quality, low-temperature hard wax, like those from Black Coral Wax, also makes clients much more comfortable because it doesn't get too hot.
Here are some tips you can give your clients to make their experience even better:
Don't take stimulants: Stay away from caffeine and alcohol for a few hours before, as they can make your skin more sensitive.
Breathe Through It: It sounds easy, but taking a deep breath while the wax is being removed helps lessen the feeling.
Keep It Up: Over time, regular waxing makes the hair follicle weaker. Every session really does get easier and less painful than the last.
What is the difference between threading and waxing your eyebrows?
Both are great ways to shape your brows, but they work in different ways. The best choice usually depends on your skin type, what you like, and how you want the end result to look.
Waxing Your Eyebrows:
Uses warm wax to take off a lot of hair at once.
Perfect for making lines that are very sharp and clear.
It gets rid of all the fine, vellus hairs (also called "peach fuzz"), leaving a very clean finish.
It usually goes much faster.
Threading the Eyebrows:
Uses a twisted cotton thread to pull out one hair at a time or in a line.
It is very precise, which makes it great for shaping things in great detail.
A good choice for people who can't wax because of medications or skin problems.
Are you ready to make perfect, well-defined brows with professional-grade tools? Check out the Black Coral Wax collections to find the best hard wax for sensitive skin, precise application, and a better experience for your clients. Find out about our high-quality wax collections today.