Tools Every Beginner Needs
No matter how you choose to remove hair, these are the things you can't change when it comes to shaping and maintaining your foundation.
-
A Good Spoolie Brush: This is the most important tool you have. To see how long and naturally shaped your hair is, you need a professional spoolie to brush it into place. This simple step will show you which hairs need to be cut and which ones are too long for your desired brow line.
-
Not all tweezers are the same. Some are better than others. You need a pair of high-quality, stainless-steel ones with a calibrated grip. A slant-tip tweezer is the best choice for beginners because it has a sharp point for isolating single hairs and a flat edge for pulling out a bunch of them at once.
-
Sharp Eyebrow Scissors: To trim, you need to be very precise. Small scissors with a straight, sharp blade are made just for cutting unruly hairs that go beyond the shape of your brows. They are not meant for cutting aggressively.
-
A soft-leaded brow pencil is your map tool. A soft, light-colored pencil lets you draw lines on the skin without pulling or hurting it, clearly showing the edges of the shape you want for your brows.
Waxing Tools for Home
If you're ready to move beyond tweezing to get cleaner lines and longer-lasting results, you'll need a few more professional tools to add waxing to your routine.
Control and safety are the most important things to think about when waxing at home. Microwavable waxes heat unevenly and can burn you, but a professional wax warmer keeps the temperature steady and safe. This makes sure that the wax stays at the right honey-like consistency for a comfortable and effective application.
A professional wax warmer is an important part of safe waxing. It melts hard wax beads to the perfect temperature and keeps it there, so you don't have to guess or rush. This keeps the wax from getting too hot and hurting the skin or too cold and not sticking to the hair well.
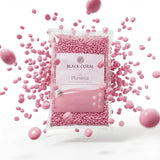
A high-quality hard wax is the best choice for the sensitive area around the eyebrows. Black Coral Wax's Pele Hard Wax Beads and Plumeria Hard Wax Beads have low melting points, which makes them great for people who are just starting out. Their soft, flexible texture makes it easy to apply exactly where you want it around the brow bone, and it only sticks to the hair, not the skin. This means that taking it off hurts a lot less and causes very little irritation after the treatment.
Check out our guide on how to choose the best hair removal kit for smooth, irritation-free skin for a full list of what to look for in a complete setup.
Starting with these basic tools sets a high standard for quality. This basic kit not only makes learning easier, but it also teaches you how to be safe, clean, and get consistently beautiful results.
How to Do Eyebrows for Beginners: Learn How to Map Your Eyebrows
You need a plan before you can take out even one hair. Eyebrow mapping is a professional method that is necessary for getting brows that are symmetrical and balanced. It takes away all the guesswork by making a clear guide that fits the shape of your face.
You are basically shaping in the dark without mapping, which often leads to brows that are too thin or uneven and don't look good on your face. Taking a few minutes to map out your hair removal will make sure that every hair you remove has a purpose, leaving you with a clean, professional arch that looks like it was made just for you.
The Three-Point Mapping Method
This old and very reliable method is great for people who are just starting out. You will need a long, straight tool, like the handle of a makeup brush or a brow pencil. This process makes sure that your brows are in line with important parts of your face, so they frame your eyes perfectly.
-
Point 1: The Beginning of Your Brow: Put your straightedge vertically along the side of your nose, pointing straight up toward your forehead. Your eyebrow should start where the tool meets your brow. Use your brow pencil to mark this spot. You can get rid of any hair between the two starting points (over the bridge of your nose).
-
Point 2: The Top of Your Arch: While looking straight ahead, keep the base of the tool at your nose and turn it so that it lines up with the outer edge of your iris. The natural top of your arch is where it crosses your brow bone. This is the point where your brow should have the most defined lift.
-
Point 3: The End of Your Brow: Finally, pivot the tool from your nostril one last time to the outer corner of your eye. Where it meets your brow line is where your eyebrow should gracefully taper. Any hairs extending beyond this mark can be removed to create a clean, polished tail.
Once you have these three marks, use a soft pencil to gently connect them, outlining the top and bottom of your brow. This becomes your definitive guide. Any hair falling outside these lines is designated for removal.
Common Mapping Mistakes and How to Fix Them
Even with a guide, minor errors can occur. Knowing what to watch for will help you achieve a more polished and professional result from the start.
Mistake 1: Angling the Start Point Outward A common error is tilting the mapping tool away from the nose when finding the start point. This creates excessive space between the brows, which can make the nose appear wider and disrupt facial balance.
Mistake 2: Placing the Arch Too Far In Another frequent misstep is mapping the arch from the pupil instead of the outer iris. This places the arch too close to the center of the face, creating a perpetually surprised look rather than an elegant lift.
It's no surprise that studies show 70% of women report getting uneven brows from skipping the mapping step, which often leads to over-plucking regrets. To avoid this, always follow a precise process. First, map your arch by aligning a pencil from your nostril to the outer edge of your iris. Then, tweeze any stray hairs outside your drawn shape, always pulling in the direction of growth to minimize discomfort-much like the flexible, gentle pull of Black Coral's professional hard waxes. Learn more about these eyebrow makeup market insights and how mapping plays a crucial role in achieving desired results.
Learning how to do eyebrows for beginners is about mastering the fundamentals. Mapping is that foundation. For more in-depth shaping advice, explore our guide on The Art of Eyebrow Definition Waxing, Shaping, and Styling Tips.
A Beginner's Guide to At-Home Eyebrow Waxing
Tweezing is precise, but nothing beats waxing for a very clean finish and long-lasting smoothness. For a lot of people who are just starting to learn how to do their eyebrows, waxing at home can seem scary. But it is a skill that can be learned with a focus on safety, cleanliness, and the right way to do things.
Using a professional-grade hard wax is the key to getting salon-quality smoothness without any irritation. To get rid of hair cleanly from the root, you need to prepare your skin properly, use the right consistency of wax, and apply it carefully. This guide will show you how to do it, making what seems like a hard job into a simple and useful part of your grooming routine.
Getting Ready for a Clean and Safe Wax
You have to prepare properly. Always start by using a gentle, alcohol-free cleanser to clean the area around your eyebrows to get rid of makeup, oil, or lotion. Dry the skin completely. If there is still moisture, the wax won't stick properly.
After that, sprinkle some pre-wax powder or cornstarch on top. This step is a secret among professionals; it gets rid of any extra moisture and makes a barrier between the wax and your skin. This makes sure that the wax only sticks to the hair, which makes the process less painful and lowers the chance of lifting delicate skin.
For safety and good results, the quality and temperature of your wax are very important. The market for cosmetic wax is huge, worth $16.9 billion in 2025 and expected to reach $31.3 billion by 2035. However, not all waxes work the same way. If you're just starting out, a professional-grade hard wax with a low melting point is the best choice. A formula like Black Coral's Pele beads, which works best at 140°F (60°C), is a much safer choice. Compared to regular hot waxes, these formulas can lower the risk of burns by as much as 25%. GMI Insights has a full analysis of the cosmetic wax industry that goes into more detail about these trends.
How to Apply and Remove
It's time to put on the wax now that your skin is ready. It should be thick and warm, like honey, and it should slide off the applicator stick easily without being runny. It's too hot if it's too thin, and not warm enough if it's clumpy.
-
Do small parts of the work: Don't try to wax the whole area under the brow at once. To get a small bead on the tip, dip a small applicator into the wax.
-
Apply with care: After you drew the bottom line, spread a thin, even layer of wax in the direction that your hair grows. Press down hard to make sure the wax covers all of the hair.
-
Make a "lip": Make the edge of the wax strip a little thicker at the end. You can use this "lip" as a handle to quickly and easily remove it.
Give the wax about 30 to 60 seconds to harden. When it feels firm and isn't sticky anymore, it's ready. At this point, the wax has wrapped around the hairs and is ready to be taken off.
How you take it off is the most important thing. With one hand, pull the skin tight. With your other hand, hold the wax lip you made and quickly pull it back parallel to the skin, not up and away. This method is very important-lab tests show that a parallel pull can be up to 95% less painful and lowers the risk of irritation or bruising by a lot.
The table below shows the best ways to do things and the most common mistakes beginners make.
Beginner's Waxing Checklist: Do's and Don'ts
|
Action
|
Do (The Professional Way)
|
Don't (Common Mistakes to Avoid)
|
|
Skin Prep
|
Cleanse the area and apply pre-wax powder to create a barrier.
|
Skip cleansing or apply wax to damp, oily skin.
|
|
Wax Temperature
|
Heat wax to a thick, honey-like consistency (around 140°F for hard wax).
|
Use wax that is too hot (runny) or too cool (clumpy).
|
|
Application
|
Apply a thin, even layer in the direction of hair growth.
|
Apply a thick, uncontrolled layer that is difficult to manage.
|
|
Work Area
|
Work in small, manageable sections for superior control.
|
Attempt to wax the entire brow area in one large strip.
|
|
Removal
|
Pull swiftly, parallel to the skin, while holding the skin taut.
|
Pull straight up, which causes pain and potential bruising.
|
|
Location
|
Focus on removing strays below the brow and between the brows.
|
Wax above the brow, which can compromise your natural arch.
|
Adhering to these guidelines will help you avoid common frustrations and achieve flawless at-home results.
Critical Mistakes for Beginners to Avoid
Understanding what not to do is as important as knowing the correct steps. Avoid these common errors to ensure clean results without damaging your brows or skin.
Mistake #1: Waxing Above the Brow This is the most significant and potentially damaging mistake. The hair above your brow defines your natural arch. Removing it can lower the arch, flatten its shape, and create a harsh, unnatural appearance. Confine your waxing to strays below the brow, between the brows, and at the temples.
Mistake #2: Using Too Much Wax Applying a thick layer of wax is counterproductive. It is messy, difficult to control, and can drip into unwanted areas. The wax also takes longer to set, often leading to a weak pull that breaks hairs instead of removing them from the root. Thin, even layers are the key to a strong, clean removal.
Mastering at-home brow waxing takes practice, but with these professional tips, you will be shaping with confidence. For a more advanced look, our professional’s guide on eyebrow waxing with hard wax for flawless shaping offers further instruction.
How To Tweeze and Trim for a Polished Finish
Once waxing has created a clean canvas, it is time for the final, defining details. Tweezing and trimming are the small but critical actions that elevate your brows from merely clean to professionally polished.
While waxing addresses the bulk of the hair, tweezing is for precision. It is used to sharpen lines, perfect the arch, and remove stubborn strays that waxing may have missed. The art of how to do eyebrows for beginners is about more than just removal; it’s about the final edit that yields an impeccably sculpted look.
Perfecting Your Shape With Precision Tweezing
Tweezing is your tool for creating crisp, clean lines. To enhance comfort, tweeze immediately after a warm shower or after applying a warm compress to your brows. The warmth softens the skin and opens hair follicles, allowing hairs to be removed with minimal resistance.
Before you pull, use your free hand to hold the skin taut. This is a non-negotiable step that provides a firm surface for the tweezers and dramatically reduces the stinging sensation.
Always tweeze in the direction of hair growth. Plucking against the grain can break the hair at the skin's surface, leading to faster regrowth and increasing the risk of ingrown hairs. A single, quick pull is all that is required.
Tweezers are a staple in every brow artist's kit. The global brow tools market is projected to reach USD 1.2 billion by 2026, with tweezers comprising a significant 40%. For a beginner, using a high-quality pair of slant tweezers can reduce shaping mistakes by up to 50% compared to less precise methods.
The Correct Way To Trim Overgrown Hairs
Trimming is essential for a manicured look, but it is also where many beginners make mistakes. The golden rule is restraint. You are only snipping the very tips of hairs that fall outside your ideal brow line, not giving your brows a haircut.
To avoid over-trimming, follow this professional technique:
-
Brush Hairs Up: Using a clean spoolie, brush all brow hairs straight up toward your forehead. This reveals their true length and identifies which ones require trimming.
-
Trim Sparingly: With a pair of sharp, straight-bladed brow scissors, carefully snip only the tips of hairs extending above the top line of your brow. Work on one or two hairs at a time for maximum control.
-
Brush and Check: Brush the hairs back into their natural position. If you see more stragglers, repeat the process. This conservative approach prevents gaps and a choppy appearance.
The goal is to maintain a soft, natural texture. Remember, you can always trim more, but you cannot replace hair once it is gone. For more professional tips on managing strays, see our guide on how to keep your skin smooth after waxing.
By combining careful trimming with precise tweezing, you will achieve the flawless, high-definition finish that complements the clean lines created by waxing.
Essential Aftercare for Healthy Skin and Lasting Results
After the last hair is gone, the process isn't over yet. When you're learning how to do eyebrows for beginners, the next steps are just as important as the shaping itself. This last step makes sure that your skin stays calm, healthy, and free of irritation after waxing.
Tweezing and waxing temporarily open your pores, making them more likely to get bacteria and redness. The things you do right after grooming protect this sensitive area, calm down inflammation, and keep the clean lines you worked so hard to get.
Soothing the skin right after waxing
As soon as you're done waxing or plucking, your skin needs gentle care right away. The main goals are to calm the redness, rehydrate the skin, and help pores close so that bacteria can't get in.
The first thing you should do is put on a good post-wax oil. Black Coral Wax's ʻili Post-Wax Oil is an example of a product made just for this purpose. It gently gets rid of sticky wax residue and its natural ingredients calm inflammation and hydrate the skin. Put a little bit on a cotton pad and gently press it onto the areas that need it.
Taking care of your skin is important aftercare. A good soothing oil helps the skin's natural barrier heal after hair removal, which is temporarily broken. This simple step can greatly lower the chance of getting folliculitis (small red bumps) and other types of irritation.
Let your skin breathe in addition to using an oil. Don't touch the area with your fingers because this can spread oils and bacteria, which can cause breakouts.
What to Stay Away From in the First 24 Hours
Your skin is most sensitive for the first 24 hours after waxing. You need to stay away from some things to keep your results clean and avoid irritation.
-
No Harsh Skin Care: Don't use products with alcohol, exfoliants (like AHAs or BHAs), or retinoids on skin that has just been treated. These ingredients are too harsh.
-
Don't put on any makeup, like foundation, concealer, or brow pencils. Makeup can block open pores, which can cause bumps or infections.
-
Don't sweat or get too hot. Wait to take hot showers, go to saunas, steam rooms, or do intense workouts. Too much heat and sweat can make your skin feel itchy and give bacteria a place to grow.
-
Don't go outside in the sun: Skin that has just been waxed is very likely to get sunburned and hyperpigmented. Stay out of the sun and tanning beds for at least 24 hours.
Our guide on important after-waxing care products goes into more detail about how to protect your skin.
Long-Term Care for Perfect Brows
After the first 24 hours, your focus shifts to keeping your new shape. A simple, regular routine will keep your brows looking sharp between full shaping sessions.
Depending on how fast your hair grows, you usually only need a full reshaping every three to four weeks. This includes mapping and waxing. In the meantime, upkeep is very important.
Check for stray hairs that grow outside of your defined brow line every few days. Quickly get rid of them with your slant-tip tweezers. This "touch-up" habit keeps your brows looking clean and intentional and stops stray hairs from building up. This makes your next full shaping session much faster and easier.
Frequently Asked Questions About Shaping Your Eyebrows
It can be scary to start grooming your eyebrows, and it's normal to have questions. It's normal to feel unsure or hesitant when you're learning how to do eyebrows for the first time. This part gives clear, professional answers to the most common questions.
Our expert advice is meant to help you feel ready and confident for any brow-shaping situation, whether you're worried about dealing with pain, fixing a mistake, or setting up a maintenance schedule.
What if I accidentally plucked my eyebrows too much?
First, don't freak out; this happens to a lot of people. The first thing to do is put the tweezers down. Don't give in to the urge to "even things out," because this usually leads to more plucking and thinner brows.
Letting the hairs grow back is the best thing you can do. While you wait, use a fine-tipped brow pencil or a soft powder to fill in any thin spots with light strokes that look like hair. Hairs usually come back in a few weeks, but it can take months for all of them to grow back, depending on how fast your hair grows.
Adding a brow growth serum to your routine might help this process. These products have ingredients that condition and strengthen hair follicles, which may help hair grow back faster and thicker. You need to be patient, but with the help of cosmetics, the wait is easier.
How can I make waxing and plucking my hair hurt less?
Getting ready and using the right technique are the keys to minimizing pain. A few small changes can have a big impact.
Always wash and warm your skin first. After a warm shower is the best time to shape your brows because the steam opens up pores and softens hair follicles, making it easier to remove hair.
Here are some professional tips to help ease the pain:
-
Keep the skin tight: This is something that can't be changed for either waxing or tweezing. Use the fingers of your non-dominant hand to gently pull the skin around the hair you want to remove. This makes the surface more stable and greatly reduces the feeling of pulling.
-
Pull in the Right Way: Always pull the hair in the same direction it grows when you tweeze. When waxing, quickly pull the strip back so that it is parallel to the skin. Never pull it up and away from your face. This parallel motion is much less painful for the skin.
-
Calm Down Right Away: Put a calming post-wax oil or a cool compress on the area as soon as you're done. This helps calm the skin and close the pores, which gives you quick relief.
How often should I shape my eyebrows?
A good maintenance schedule is the key to keeping your brows looking sharp all the time. A general timeline works for most people, but it depends on how fast your hair grows.
You usually only need a full shaping session, which includes mapping, waxing, and trimming, every three to four weeks. This is how long it takes for enough new growth to show up to need a full cleanup.
In between these full sessions, small touch-ups are necessary. Use your tweezers to pull out any stray hairs that are clearly outside your defined brow line every few days. This quick and easy habit only takes a minute, but it keeps your look clean and polished and makes your next full shaping session go much faster and easier.
We at Black Coral Wax think that anyone can get professional-quality results if they have the right tools and knowledge. Our high-quality waxes and aftercare products are made to make your experience at home safe, comfortable, and very effective.
Check out our full line of professional waxing supplies to find the right ones for your professional-grade routine.